

Fun with SDL3 and Clay (3)
Over the previous two posts (part 1, part 2), we set up SDL3 and Clay and rendered some text in a rounded rectangle in a window.
Here’s a snapshot of the project so far. Our current file tree looks as follows:
├── Makefile├── out/│ └── app├── resources/│ └── Fira-Code.ttf└── src/ ├── clay/ │ ├── clay.h │ ├── renderer.c │ └── renderer.h ├── event.c ├── init.c ├── iterate.c ├── layout/ │ ├── layout.c │ └── layout.h ├── quit.c └── state.hAdding interactivity
We’re going to add a little interactivity by creating a button that toggles the theme between dark and light mode.
Extracting theme to state
First things first, let’s extract the currently used colours into the AppState struct. We’ll be able to access them from any components via app state from now on.
enum FontID {    FONT_NORMAL,    FONT_BOLD,    FONT_ITALIC,    FONT_COUNT};
typedef struct ColorSet {    Clay_Color background;    Clay_Color foreground;    Clay_Color accent;    Clay_Color text;} ColorSet;
typedef enum Theme {    THEME_DARK,    THEME_LIGHT} Theme;
typedef struct AppState { SDL_Window *window; Clay_SDL3RendererData rendererData; ColorSet colors; Theme theme; bool needs_redraw; bool animating; Uint64 last_frame_ns;} AppState;Clay_RenderCommandArray create_app_layout(AppState *state) { Clay_BeginLayout();
const Clay_Color backgroundColor = { 30, 30, 46, 255 }; const Clay_Color foregroundColor = { 24, 24, 37, 255 }; const Clay_Color accentColor = { 49, 50, 68, 255 }; const Clay_Color textColor = { 205, 214, 244, 255 };
CLAY(CLAY_ID("Main Container"), { .layout = { .layoutDirection = CLAY_TOP_TO_BOTTOM, .sizing = { .width = CLAY_SIZING_GROW(0), .height = CLAY_SIZING_GROW(0) }, .padding = CLAY_PADDING_ALL(8) }, .backgroundColor = backgroundColor .backgroundColor = state->colors.background }) { CLAY(CLAY_ID("Text Container"), { .layout = { .padding = CLAY_PADDING_ALL(8) }, .backgroundColor = foregroundColor, .backgroundColor = state->colors.foreground, .border = { .color = accentColor, .color = state->colors.accent, .width = CLAY_BORDER_ALL(1) }, .cornerRadius = CLAY_CORNER_RADIUS(5) }) { CLAY_TEXT(CLAY_STRING("Hello World"), CLAY_TEXT_CONFIG({ .fontSize = 16, .textColor = textColor, .textColor = state->colors.text, .fontId = FONT_NORMAL })); } }
return Clay_EndLayout();
}We need to set the initial values for our colours. Rather than directly initialising them in init.c, we’re going to create a new file theme.h, which will expose functions to set the values of each colour stored in app state:
#include "state.h"
static inline void set_theme_dark(AppState *state) {    state->colors.background = (Clay_Color){ 30, 30, 46, 255 };    state->colors.foreground = (Clay_Color){ 24, 24, 37, 255 };    state->colors.accent = (Clay_Color){ 49, 50, 68, 255 };    state->colors.text = (Clay_Color){ 205, 214, 244, 255 };
    state->theme = THEME_DARK;    state->needs_redraw = true;}
static inline void set_theme_light(AppState *state) {    state->colors.background = (Clay_Color){ 239, 241, 245, 255 };    state->colors.foreground = (Clay_Color){ 230, 233, 239, 255 };    state->colors.accent = (Clay_Color){ 204, 208, 245, 255 };    state->colors.text = (Clay_Color){ 76, 79, 105, 255 };
    state->theme = THEME_LIGHT;    state->needs_redraw = true;}
static inline void toggle_theme(AppState *state) {    if (state->theme == THEME_DARK)        set_theme_light(state);    else        set_theme_dark(state);}
We can now call set_theme_dark in init.c to set an initial theme for our app:
SDL_AppResult SDL_AppInit(void **appstate, int argc, char *argv[]) {
    // ... (lines omitted)
    int width, height;    SDL_GetWindowSize(state->window, &width, &height);    Clay_Initialize(clayMemory, (Clay_Dimensions) { (float) width, (float) height }, (Clay_ErrorHandler) { HandleClayErrors });    Clay_SetMeasureTextFunction(SDL_MeasureText, state->rendererData.fonts);
    set_theme_dark(state);
    state->needs_redraw = true;    state->animating = false;    state->last_frame_ns = 0;
    return SDL_APP_CONTINUE;}
Even though set_theme_dark sets state->needs_redraw to true, I left in the statement below which does the same, as SDL_AppInit is only called once, and we could easily end up changing the way theming works later and removing the call.
Run make to verify everything still works.
From now on, any time we want to use a new colour, we will add it to the ColorSet type and access it via state->colors. We will then update theme.h with light and dark mode values for these new colours.
Testing theme toggling
We haven’t added a clickable button just yet, but it’d be nice to see the theme toggling in action. We can do that by adding a few lines to event.c:
SDL_AppResult SDL_AppEvent(void *appstate, SDL_Event *event) { AppState *state = (AppState*) appstate;
if (event->type == SDL_EVENT_KEY_DOWN && event->key.scancode == SDL_SCANCODE_ESCAPE || event->type == SDL_EVENT_QUIT) { return SDL_APP_SUCCESS; }
if (event->type == SDL_EVENT_WINDOW_RESIZED) { state->needs_redraw = true;
int width, height; SDL_GetWindowSize(state->window, &width, &height); Clay_SetLayoutDimensions((Clay_Dimensions) {(float) width, (float) height});
return SDL_APP_CONTINUE; }
if (event->type == SDL_EVENT_KEY_DOWN && event->key.scancode == SDL_SCANCODE_T) { toggle_theme(state);
return SDL_APP_CONTINUE; }
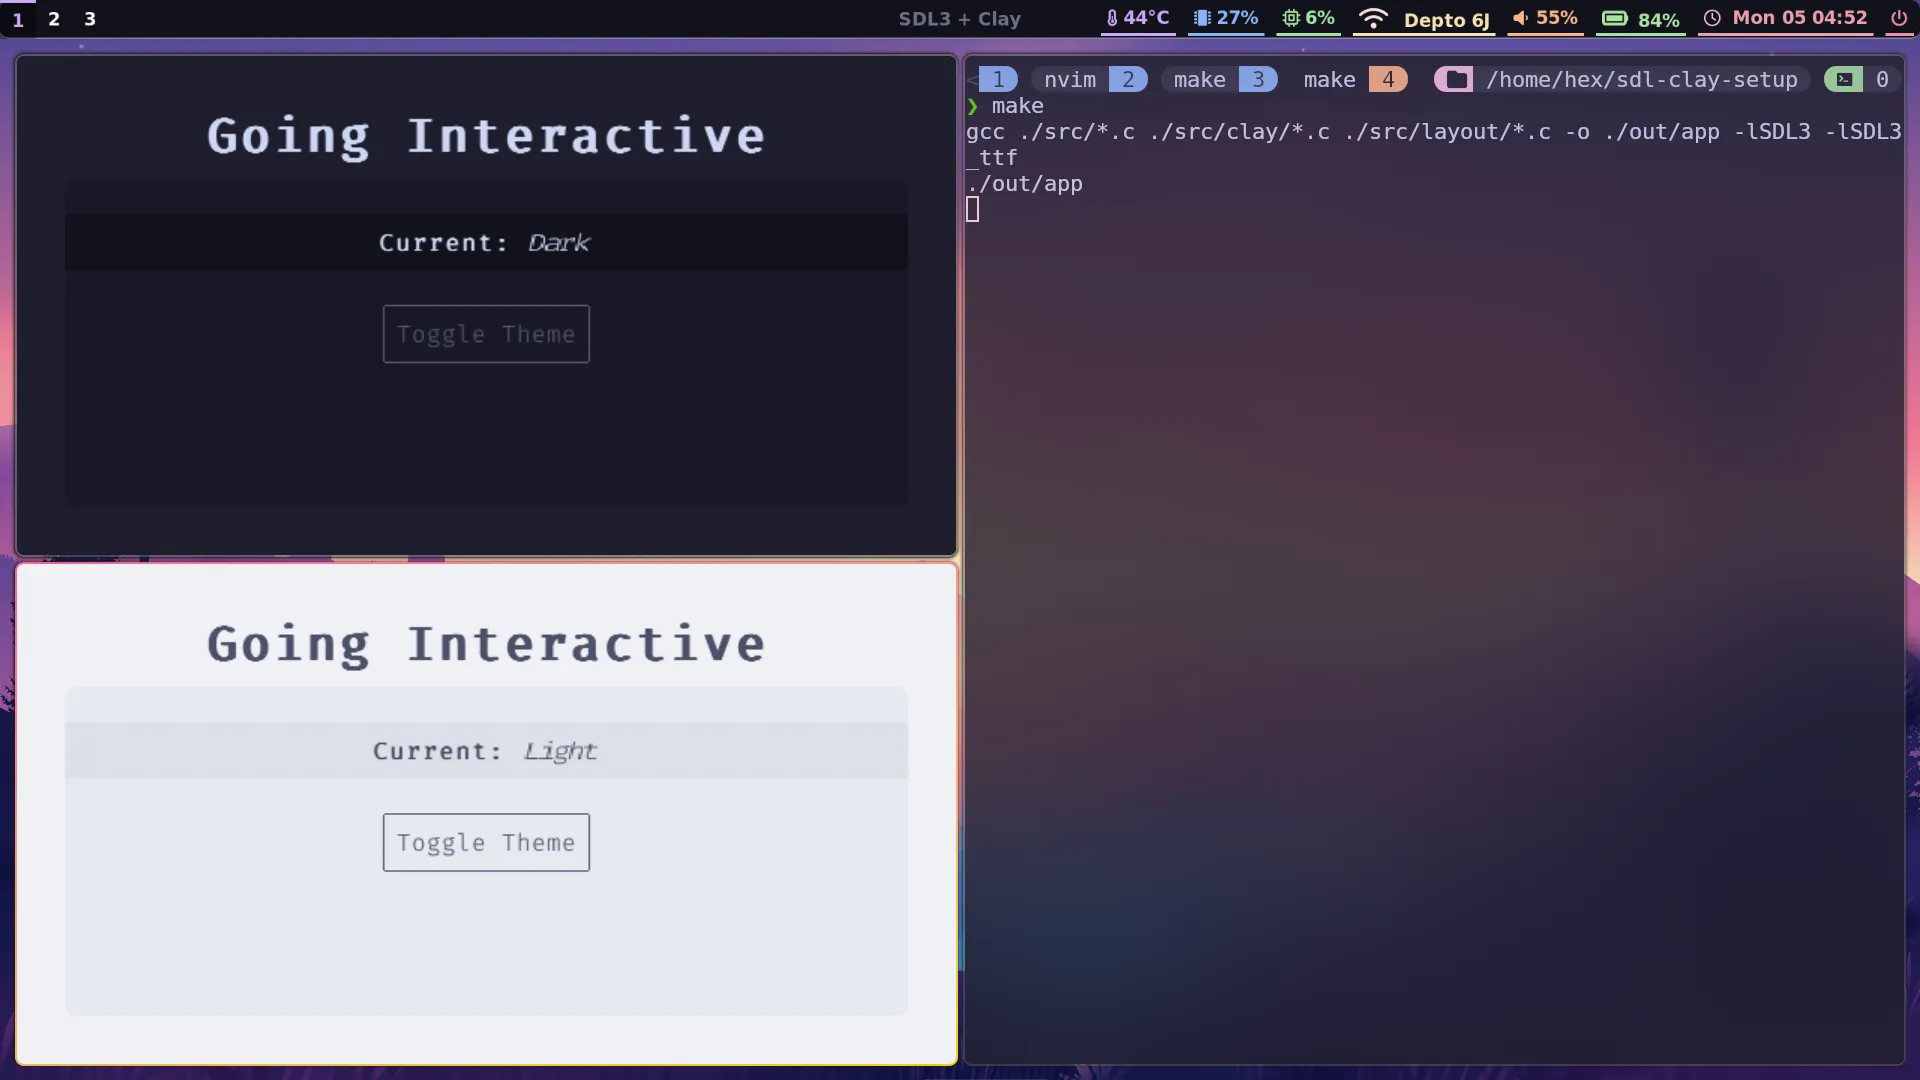
return SDL_APP_CONTINUE;}If we build now with make, pressing “t” will switch between light and dark mode. The two states are shown in different instances of the app below:
Building a new layout
In the last post I kind of threw together some Clay commands without explaining or exploring them. That was just to get something on screen as quickly as possible, but it’s worth taking a little bit more time now to understand the flow of building layouts in Clay, so we’re going to build a new layout in layout/layout.c from scratch.
All Clay layouts are declared between Clay_BeginLayout and Clay_EndLayout, so we’ll start with just that. Delete everything currently in layout/layout.c and add the following:
#include "../state.h"
Clay_RenderCommandArray create_app_layout(AppState *state) {    Clay_BeginLayout();
    return Clay_EndLayout();}
Now we can start declaring our components using the CLAY(...configuration) { ...children } macro. We can give elements a unique ID with CLAY_ID(id_string), and then supply component configuration as a struct. We’ll start with the outermost container for our app’s content, which we want to expand to fill all available space:
#include "../state.h"
Clay_RenderCommandArray create_app_layout(AppState *state) {    Clay_BeginLayout();
    CLAY(CLAY_ID("Layout Background"), {        .layout = {            .layoutDirection = CLAY_TOP_TO_BOTTOM,            .sizing = {                .width = CLAY_SIZING_GROW(0),                .height = CLAY_SIZING_GROW(0)            },            .padding = CLAY_PADDING_ALL(32),            .childGap = 8,            .childAlignment = {                .x = CLAY_ALIGN_X_CENTER            }        },        .backgroundColor = state->colors.background    }) {
    }
    return Clay_EndLayout();}
I’ve set the layout direction to be from top to bottom, rather than the default of left to right, and added some padding and child centering, as well as a background colour.
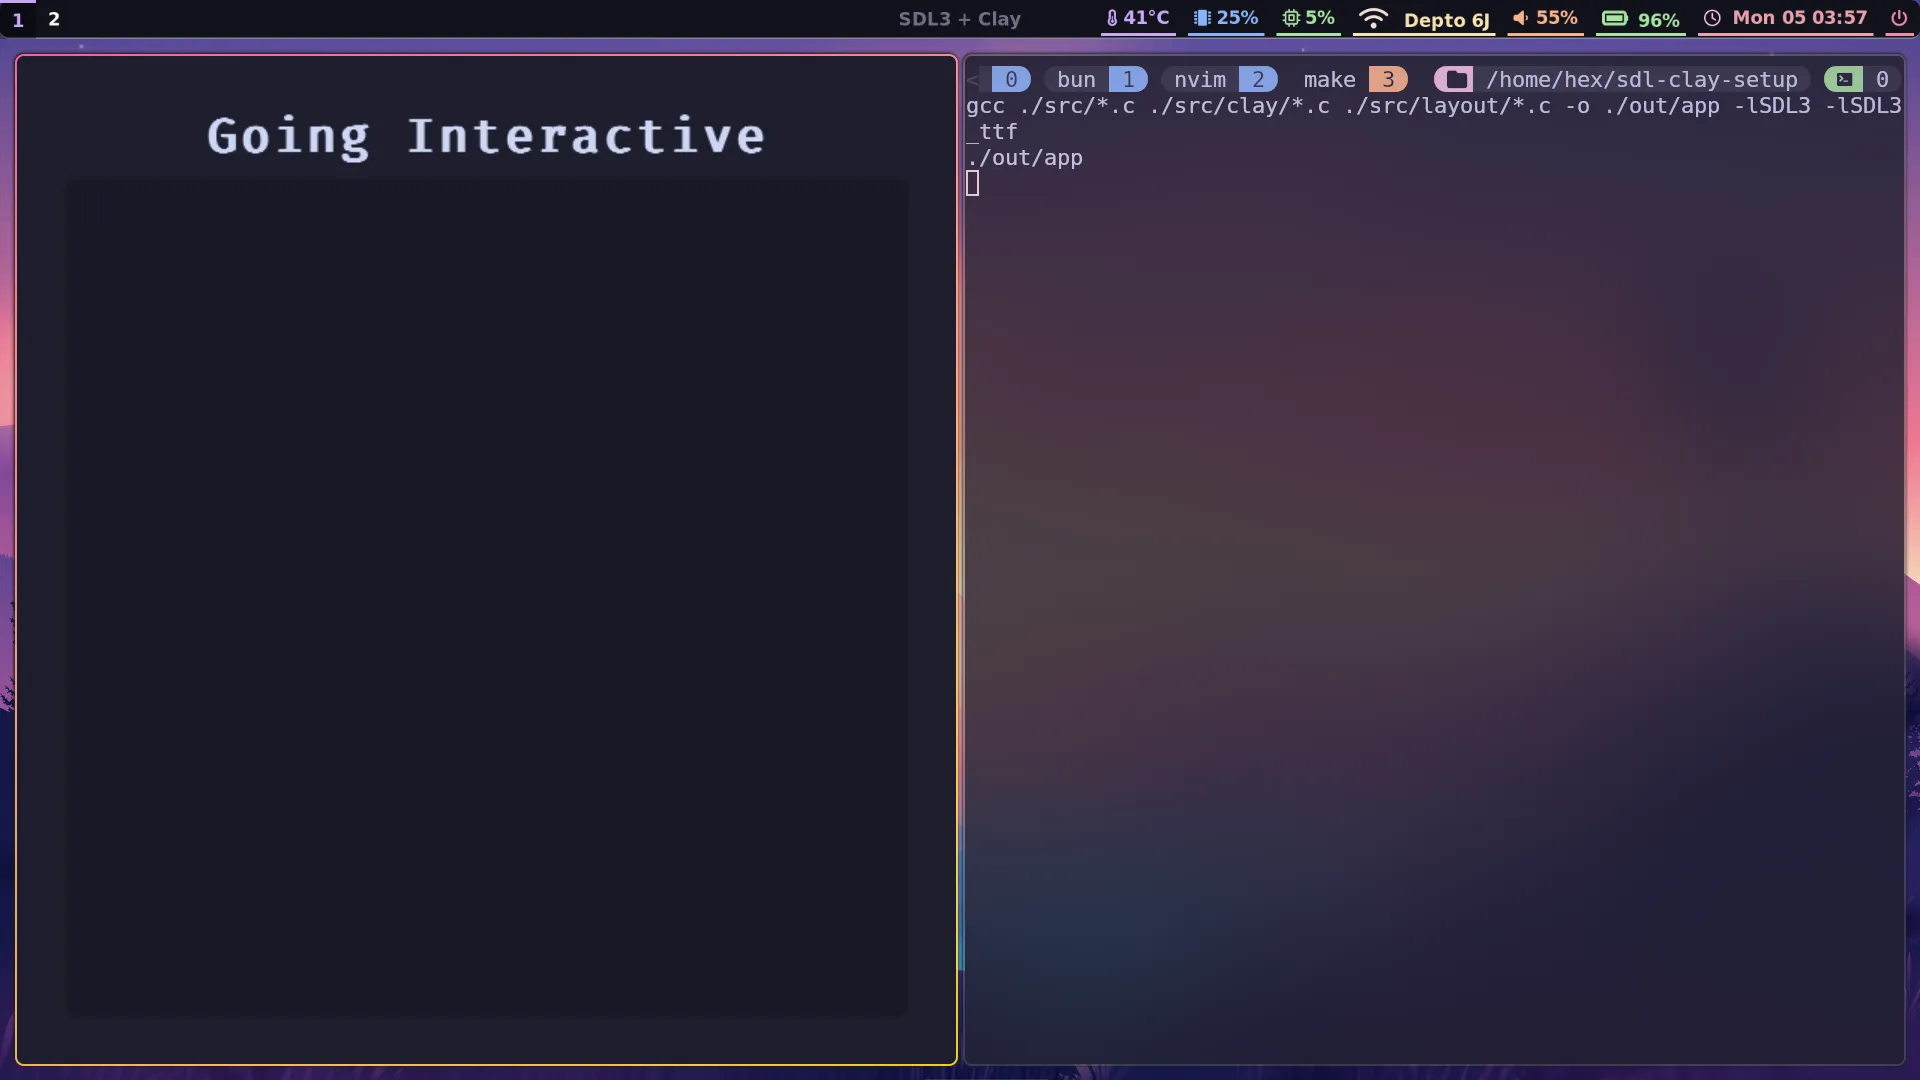
Next, we’ll add a title, and an inner container for the main non-title content. I’ve also pulled out layoutExpand as a reusable sizing. In a larger project I’d probably define it as a macro in a header file that could be shared around many different component files:
#include "../state.h"
Clay_RenderCommandArray create_app_layout(AppState *state) {    Clay_Sizing layoutExpand = {        .width = CLAY_SIZING_GROW(0),        .height = CLAY_SIZING_GROW(0)    };
    Clay_BeginLayout();
    CLAY(CLAY_ID("Layout Background"), {        .layout = {            .layoutDirection = CLAY_TOP_TO_BOTTOM,            .sizing = {                .width = CLAY_SIZING_GROW(0),                .height = CLAY_SIZING_GROW(0)            },            .sizing = layoutExpand,            .padding = CLAY_PADDING_ALL(32),            .childGap = 8,            .childAlignment = {                .x = CLAY_ALIGN_X_CENTER            }        },        .backgroundColor = state->colors.background    }) {        CLAY_TEXT(CLAY_STRING("Going Interactive"), CLAY_TEXT_CONFIG({            .fontId = FONT_BOLD,            .fontSize = 32,            .textColor = state->colors.text,        }));        CLAY(CLAY_ID("Main Container"), {            .layout = {                .layoutDirection = CLAY_TOP_TO_BOTTOM,                .sizing = layoutExpand,                .padding = {                    .top = 24                },                .childAlignment = {                    .x = CLAY_ALIGN_X_CENTER                },                .childGap = 24            },            .backgroundColor = state->colors.foreground,            .cornerRadius = CLAY_CORNER_RADIUS(8)        }) {
        }    }
    return Clay_EndLayout();}
Here’s what the results should look like so far:
Making Clay mouse-aware
We’d like to add a clickable button, but Clay is currently not aware of anything to do with mouse movement or button presses. We need to add some event handlers to event.c to remedy this. When we were only handling one or two events, a few if statements was an appropriate choice, but now is a good time to move to something a bit more maintainable by pulling everything into a switch block.
The entirely rewritten event.c will now look as follows:
#include <SDL3/SDL.h>#include "state.h"#include "theme.h"
SDL_AppResult SDL_AppEvent(void *appstate, SDL_Event *event) {    AppState *state = (AppState*) appstate;
    switch (event->type) {    case SDL_EVENT_KEY_DOWN:        switch (event->key.scancode) {        case SDL_SCANCODE_ESCAPE:            return SDL_APP_SUCCESS;        default:            break;        }
    case SDL_EVENT_MOUSE_MOTION:        state->needs_redraw = true;        Clay_SetPointerState((Clay_Vector2) { event->motion.x, event->motion.y }, event->button.down);        break;    case SDL_EVENT_MOUSE_BUTTON_DOWN:        state->needs_redraw = true;        Clay_SetPointerState((Clay_Vector2) { event->motion.x, event->motion.y }, true);        break;    case SDL_EVENT_MOUSE_BUTTON_UP:        state->needs_redraw = true;        Clay_SetPointerState((Clay_Vector2) { event->motion.x, event->motion.y }, false);        break;    case SDL_EVENT_MOUSE_WHEEL:        state->needs_redraw = true;        float deltaTime = ((float) SDL_GetTicksNS() - state->last_frame_ns) / 1e9;        Clay_UpdateScrollContainers(true, (Clay_Vector2) { event->wheel.x, event->wheel.y }, deltaTime);        break;
    case SDL_EVENT_WINDOW_RESIZED:        state->needs_redraw = true;        int width, height;        SDL_GetWindowSize(state->window, &width, &height);        Clay_SetLayoutDimensions((Clay_Dimensions) {(float) width, (float) height});        break;
    case SDL_EVENT_QUIT:        return SDL_APP_SUCCESS;    }
    return SDL_APP_CONTINUE;}
Notice that for each event, we set state->needs_redraw to true, as any mouse events require us to assume the screen needs updating. We won’t be using the scroll event data just yet, but it was convenient to add it anyway, while we’re in event.c. Now we can add our button.
Creating a button
One of the nice things about Clay is that components are just function calls, so we can extract theminto separate files, import those files and then simply use the component by calling its function. It’s very similar to frontend JavaScript frameworks like React or Svelte. We’re going to define a button component in a new file, toggle_button.c:
#include "../state.h"#include "../theme.h"
void HandleButtonInteraction(Clay_ElementId elementId, Clay_PointerData pointerInfo, void *state) {    if (pointerInfo.state == CLAY_POINTER_DATA_PRESSED_THIS_FRAME) {        toggle_theme(state);    }}
void toggle_button(AppState *state) {    CLAY(CLAY_ID("Toggle button"), {        .layout = {            .padding = CLAY_PADDING_ALL(8)        },        .backgroundColor = state->colors.foreground,        .border = {            .color = Clay_Hovered() ? state->colors.text : state->colors.textFaded,            .width = CLAY_BORDER_ALL(1)        },    }) {        bool buttonHovered = Clay_Hovered();        Clay_OnHover(HandleButtonInteraction, state);        CLAY_TEXT(CLAY_STRING("Toggle Theme"), CLAY_TEXT_CONFIG({            .fontId = FONT_NORMAL,            .fontSize = 16,            .textColor = buttonHovered ? state->colors.text : state->colors.textFaded        }));    }}
A few things need explaining in the above code. First, bool Clay_Hovered() is a function that is available to us inside any component now that Clay is aware of where the pointer is positioned in the application window. We can use that to choose different colours on hover.
Second, the Clay_OnHover function allows us to pass a function pointer and a pointer to a data structure which will be passed into the passed-in callback. This allows us to define a function with a specific signature that will be called once per frame while the mouse is inside the enclosing element. Our callback function simply calls toggle_theme if the mouse button is also pressed while hovering the component.
We will expose this function through an associated toggle_button.h header file:
#include "../state.h"
void toggle_button(AppState *state);
Now we just need to update state.h and theme.h with the new colour. Let’s also get rid of state->colors.accent, which won’t be used anymore:
typedef struct ColorSet { Clay_Color background; Clay_Color foreground; Clay_Color text; Clay_Color accent; Clay_Color textFaded;} ColorSet; state->colors.background = (Clay_Color){ 30, 30, 46, 255 }; state->colors.foreground = (Clay_Color){ 24, 24, 37, 255 }; state->colors.accent = (Clay_Color){ 49, 50, 68, 255 }; state->colors.text = (Clay_Color){ 205, 214, 244, 255 }; state->colors.textFaded = (Clay_Color){ 88, 91, 112, 255 };
state->theme = THEME_DARK; state->needs_redraw = true;}
static inline void set_theme_light(AppState *state) { state->colors.background = (Clay_Color){ 239, 241, 245, 255 }; state->colors.foreground = (Clay_Color){ 230, 233, 239, 255 }; state->colors.accent = (Clay_Color){ 204, 208, 245, 255 }; state->colors.text = (Clay_Color){ 76, 79, 105, 255 }; state->colors.textFaded = (Clay_Color){ 172, 176, 190, 255 };
state->theme = THEME_LIGHT; state->needs_redraw = true;}As a final flourish, let’s add a bar that displays the currently selected mode in text:
#include "../state.h"
void current_mode(AppState *state);#include "../state.h"
void current_mode(AppState *state) { CLAY(CLAY_ID("Current Mode"), { .layout = { .sizing = { .width = CLAY_SIZING_GROW(0) }, .childAlignment = { .x = CLAY_ALIGN_X_CENTER }, .padding = { .top = 8, .bottom = 8 } }, .backgroundColor = state->colors.bar }) { CLAY_TEXT(CLAY_STRING("Current: "), CLAY_TEXT_CONFIG({ .fontId = FONT_BOLD, .fontSize = 16, .textColor = state->colors.text })); CLAY_TEXT( state->theme == THEME_DARK ? CLAY_STRING("Dark") : CLAY_STRING("Light"), CLAY_TEXT_CONFIG({ .fontId = FONT_ITALIC, .fontSize = 16, .textColor = state->colors.text })); }}Again, we need to update our colour declarations:
typedef struct ColorSet { Clay_Color background; Clay_Color foreground; Clay_Color bar; Clay_Color text; Clay_Color textFaded;} ColorSet;static inline void set_theme_dark(AppState *state) { state->colors.background = (Clay_Color){ 30, 30, 46, 255 }; state->colors.foreground = (Clay_Color){ 24, 24, 37, 255 }; state->colors.bar = (Clay_Color){ 17, 17, 27, 255 }; state->colors.text = (Clay_Color){ 205, 214, 244, 255 }; state->colors.textFaded = (Clay_Color){ 88, 91, 112, 255 };
state->theme = THEME_DARK; state->needs_redraw = true;}
static inline void set_theme_light(AppState *state) { state->colors.background = (Clay_Color){ 239, 241, 245, 255 }; state->colors.foreground = (Clay_Color){ 230, 233, 239, 255 }; state->colors.bar = (Clay_Color){ 220, 224, 232, 255 }; state->colors.text = (Clay_Color){ 76, 79, 105, 255 }; state->colors.textFaded = (Clay_Color){ 172, 176, 190, 255 };
state->theme = THEME_LIGHT; state->needs_redraw = true;}Time to use our new components! It’s as simple as including their headers and calling the functions in our layout:
#include "../state.h"
#include "current_mode.h"#include "toggle_button.h"
Clay_RenderCommandArray create_app_layout(AppState *state) {    Clay_Sizing layoutExpand = {        .width = CLAY_SIZING_GROW(0),        .height = CLAY_SIZING_GROW(0)    };
    Clay_BeginLayout();
    CLAY(CLAY_ID("Layout Background"), {        .layout = {            .layoutDirection = CLAY_TOP_TO_BOTTOM,            .sizing = layoutExpand,            .padding = CLAY_PADDING_ALL(32),            .childGap = 8,            .childAlignment = {                .x = CLAY_ALIGN_X_CENTER            }        },        .backgroundColor = state->colors.background    }) {        CLAY_TEXT(CLAY_STRING("Going Interactive"), CLAY_TEXT_CONFIG({            .fontId = FONT_BOLD,            .fontSize = 32,            .textColor = state->colors.text,        }));        CLAY(CLAY_ID("Main Container"), {            .layout = {                .layoutDirection = CLAY_TOP_TO_BOTTOM,                .sizing = layoutExpand,                .padding = {                    .top = 24                },                .childAlignment = {                    .x = CLAY_ALIGN_X_CENTER                },                .childGap = 24            },            .backgroundColor = state->colors.foreground,            .cornerRadius = CLAY_CORNER_RADIUS(8)        }) {            current_mode(state);            toggle_button(state);        }    }
    return Clay_EndLayout();}
After building, you should at last be presented with a working theme-toggling button!
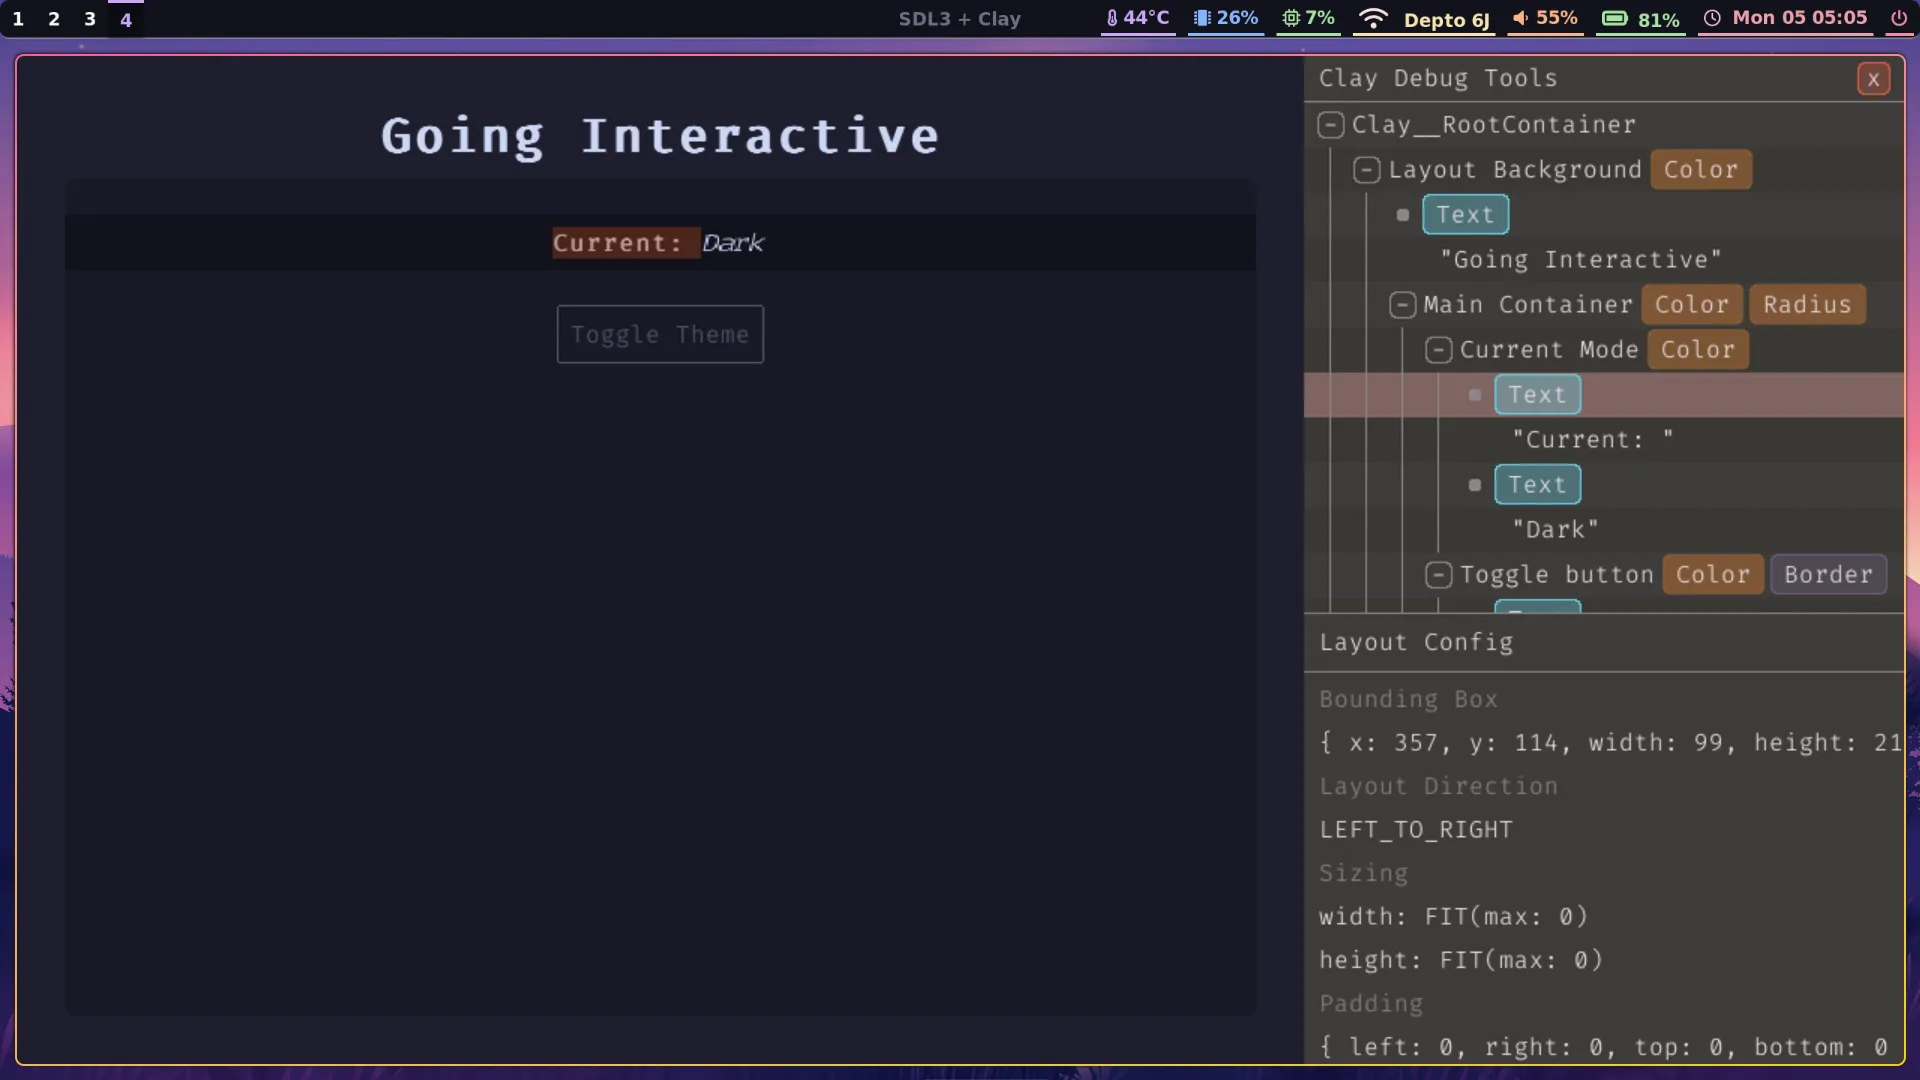
The Clay debug console
One of the craziest things about Clay is that the entire codebase is under 4,500 lines of code in size, yet somehow Nic managed to find the space to fit an entire debug console. Let’s enable it with the ' key. First, we need to add a new flag in state.h:
typedef struct AppState { SDL_Window *window; Clay_SDL3RendererData rendererData; ColorSet colors; Theme theme; bool needs_redraw; bool animating; Uint64 last_frame_ns; bool debug_open;} AppState;Now we simply add the console toggle in event.c:
    switch (event->type) {    case SDL_EVENT_KEY_DOWN:        switch (event->key.scancode) {        case SDL_SCANCODE_ESCAPE:            return SDL_APP_SUCCESS;        case SDL_SCANCODE_APOSTROPHE:            state->needs_redraw = true;            state->debug_open = !state->debug_open;            Clay_SetDebugModeEnabled(state->debug_open);            break;        default:            break;        }
    // ... (omitted)
    }
Pressing ' opens a side panel that works much the same way as the inspector view in your browser, where you can mouseover elements in the DOM tree and see them light up in the page, or click on them and see various information.
CMake and WebAssembly
To finish off, let’s set up a CMake build process that will allow us to build both a desktop and a WebAssembly version of our app that can be deployed directly to the web. This will replace our current, much simpler Makefile approach.
Currently, SDL3_ttf is not automatically provided by Emscripten yet, so we must vendor and build it outselves in order to be able to build our application to WASM.
rm -rf outrm Makefilemkdir vendoredtouch CMakeLists.txtIn order to vendor SDL3_ttf we must also vendor SDL3 itself. We will use Git submodules:
git submodule add https://github.com/libsdl-org/SDL vendored/SDLgit submodule add https://github.com/libsdl-org/SDL_ttf vendored/SDL_ttfgit submodule update --init --recursiveDon’t worry if the above commands take a long time (and a substantial amount of disk space), just wait for them to complete before continuing.
Paste the following into CMakeLists.txt:
cmake_minimum_required(VERSION 3.16)project(sdl-clay-setup C)
# ------------------------------------------------------------# Sources# ------------------------------------------------------------set(SRC_FILES    src/init.c    src/iterate.c    src/event.c    src/quit.c    src/clay/renderer.c    src/layout/layout.c    src/layout/toggle_button.c    src/layout/current_mode.c)
# Create executableadd_executable(app ${SRC_FILES})
# ------------------------------------------------------------# Platform-specific configuration# ------------------------------------------------------------if(EMSCRIPTEN)    message(STATUS "Configuring for Emscripten / WASM")
    # Set output suffix to .html    set_target_properties(app PROPERTIES SUFFIX ".html")
    # Preload resources folder    set(EMCC_ASSETS "--preload-file ${CMAKE_SOURCE_DIR}/resources@/resources")    set_target_properties(app PROPERTIES LINK_FLAGS "${EMCC_ASSETS}")
    # Add vendored SDL libraries    add_subdirectory(vendored/SDL EXCLUDE_FROM_ALL)    set(SDLTTF_VENDORED ON CACHE BOOL "" FORCE)    add_subdirectory(vendored/SDL_ttf EXCLUDE_FROM_ALL)
    # Explicitly propagate include directories    target_include_directories(app PUBLIC        vendored/SDL/include        vendored/SDL_ttf/include    )
    # Link the libraries    target_link_libraries(app PUBLIC SDL3 SDL3_ttf::SDL3_ttf)
else()    # ------------------------------------------------------------    # Desktop build (Linux)    # ------------------------------------------------------------    message(STATUS "Configuring for desktop build")
    # Copy resources folder for desktop builds    add_custom_command(TARGET app POST_BUILD        COMMAND ${CMAKE_COMMAND} -E copy_directory        ${CMAKE_SOURCE_DIR}/resources $<TARGET_FILE_DIR:app>/resources    )
    # Use system SDL3 packages    find_package(SDL3 REQUIRED)    find_package(SDL3_ttf REQUIRED)
    target_link_libraries(app PUBLIC SDL3::SDL3 SDL3_ttf::SDL3_ttf)endif()
I’m not going to attempt to explain this code because, honestly, I’m still getting to grips with CMake basics and it’s a pretty complicated bit of software 😅. Just know that the above is enough to build both a Linux desktop and an Emscripten WebAssembly version of our application.
We need to make one last change before we can build. For some reason, I couldn’t get a unified filepath working for the font loading in init.c, but using some #ifdef __EMSCRIPTEN guards was enough to produce a working build:
SDL_AppResult SDL_AppInit(void **appstate, int argc, char *argv[]) {
    // ... (omitted)
    state->rendererData.fonts = SDL_calloc(FONT_COUNT, sizeof(TTF_Font *));    if (!state->rendererData.fonts) {        SDL_LogError(SDL_LOG_CATEGORY_ERROR, "Failed to allocate memory for the font array = %s", SDL_GetError());        return SDL_APP_FAILURE;    }
    #define FONT_PATH "resources/Fira-Code.ttf"    #ifdef __EMSCRIPTEN__    #define FONT_PATH "/resources/Fira-Code.ttf"    #else    char* basePath = (char*)SDL_GetBasePath();    char fontPath[1024];    snprintf(fontPath, sizeof(fontPath), "%sresources/Fira-Code.ttf", basePath);    SDL_free(basePath);    #define FONT_PATH fontPath    #endif
    TTF_Font* font_normal = TTF_OpenFont(FONT_PATH, 24);    TTF_Font* font_bold   = TTF_OpenFont(FONT_PATH, 24);    TTF_Font* font_italic = TTF_OpenFont(FONT_PATH, 24);
    // ... (omitted)
    return SDL_APP_CONTINUE;}
Make sure to also include <stdio.h> for the snprintf call.
Now, to build the WebAssembly version, run:
emcmake cmake -S . -B build-wasmcmake --build build-wasmWhen it completes, you’ll need an HTTP server to serve the directory:
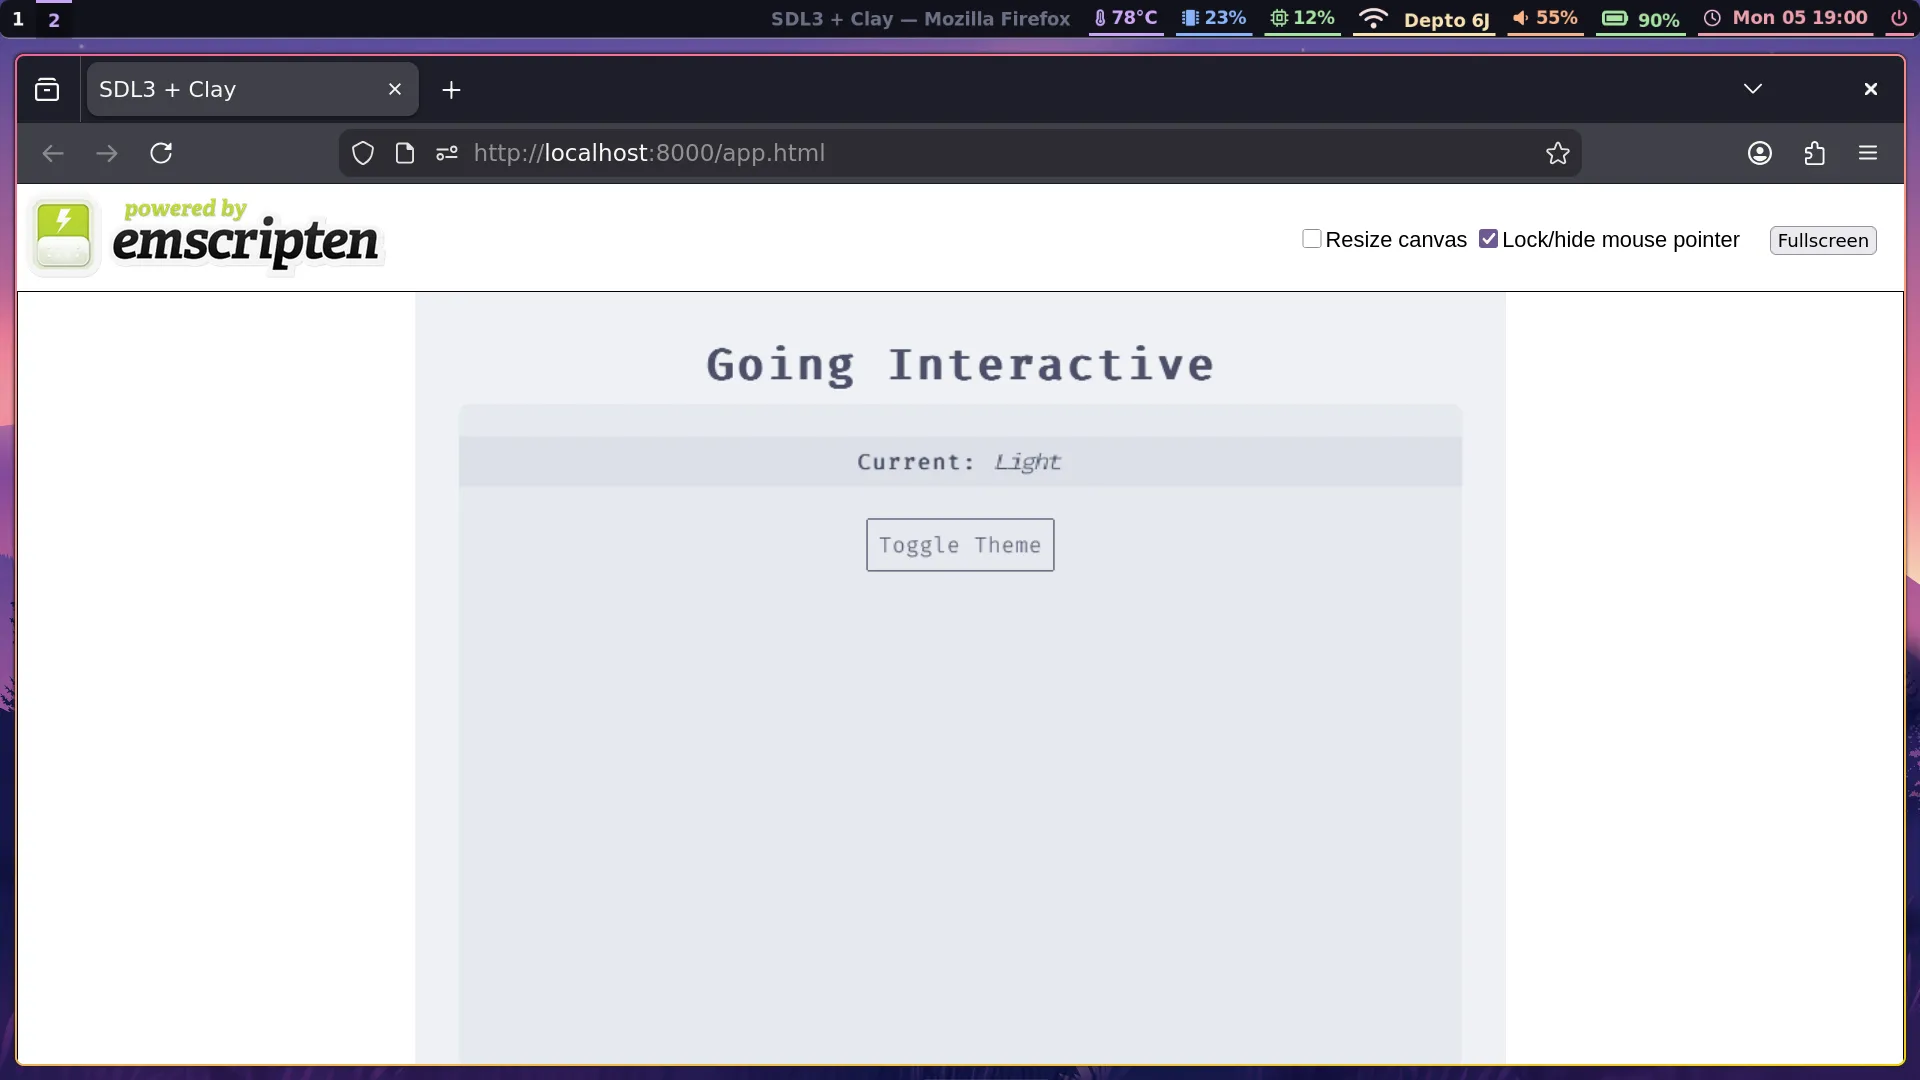
python3 -m http.serverOpen http://localhost:8000/app.html to view the built application in your browser. Woo!
Running the following will build the desktop version:
cmake -S . -B build-desktopcmake --build build-desktop./build-desktop/appFrom now on, running make -j$(nproc) from inside either build-wasm or build-desktop will rebuild the corresponding versions of the application.
What’s next?
Well, we’ve got a working template SDL3 + Clay project all set up at last, and explored just a little bit of the functionality of each library. I plan on using this skeleton project as the base for a cross-platform music application in the near future, so you should see more posts featuring SDL and Clay soon.
The final project code can be found here.
← Back to blog